Deploy Tailscale with Jamf Pro
You can use the Jamf Pro mobile device management (MDM) solution to deploy Tailscale across your organization. Jamf Pro lets you distribute and install Tailscale automatically on your fleet of devices. You can then configure a number of system policies, and use Jamf Pro to deploy these policies across the devices in your organization. Tailscale system policies via Jamf Pro are supported on macOS and iOS.
If you need help deploying Tailscale using Jamf Pro, or would like to suggest any feature enhancements, contact our support or sales teams.
Distributing Tailscale using Jamf Pro
You can distribute Tailscale on the devices in your fleet using Jamf Pro. You can choose to deploy either the Mac App Store variant of the client, or the Standalone variant. You can find more information on the differences between the two variants at Three ways to run Tailscale on macOS.
Distributing the Mac App Store variant of the client
-
Login to the Jamf Pro admin console for your organization at
<companyName>.jamfcloud.com. -
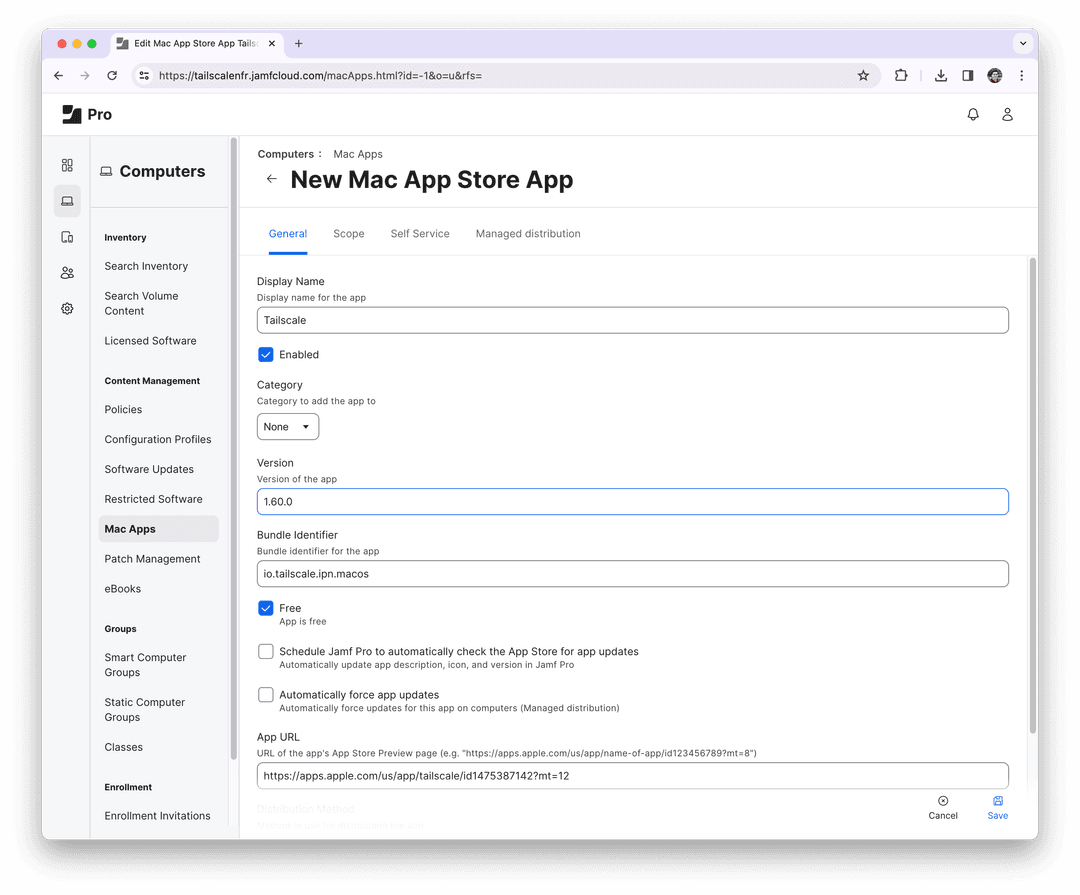
Navigate to Computers in the sidebar, and then Mac Apps in the Content Management section. Move to the App Store tab.
-
Select the New button at the top-right to add a new app.
-
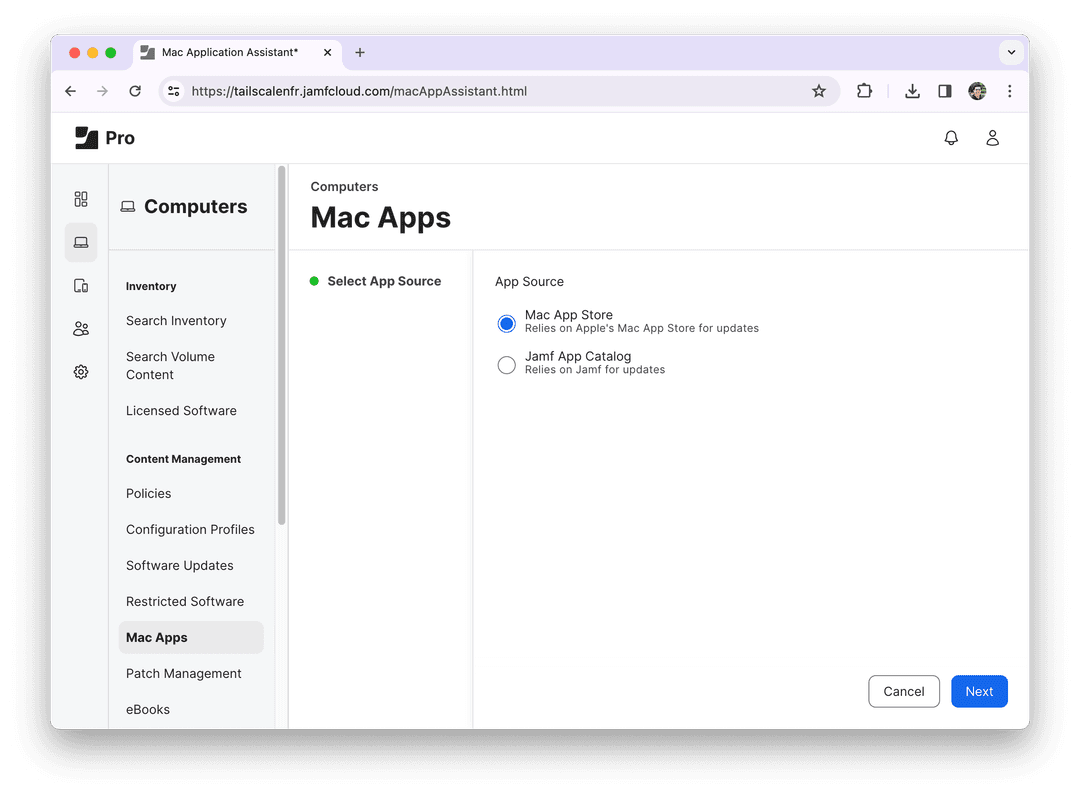
Choose Mac App Store as the source for the app.
-
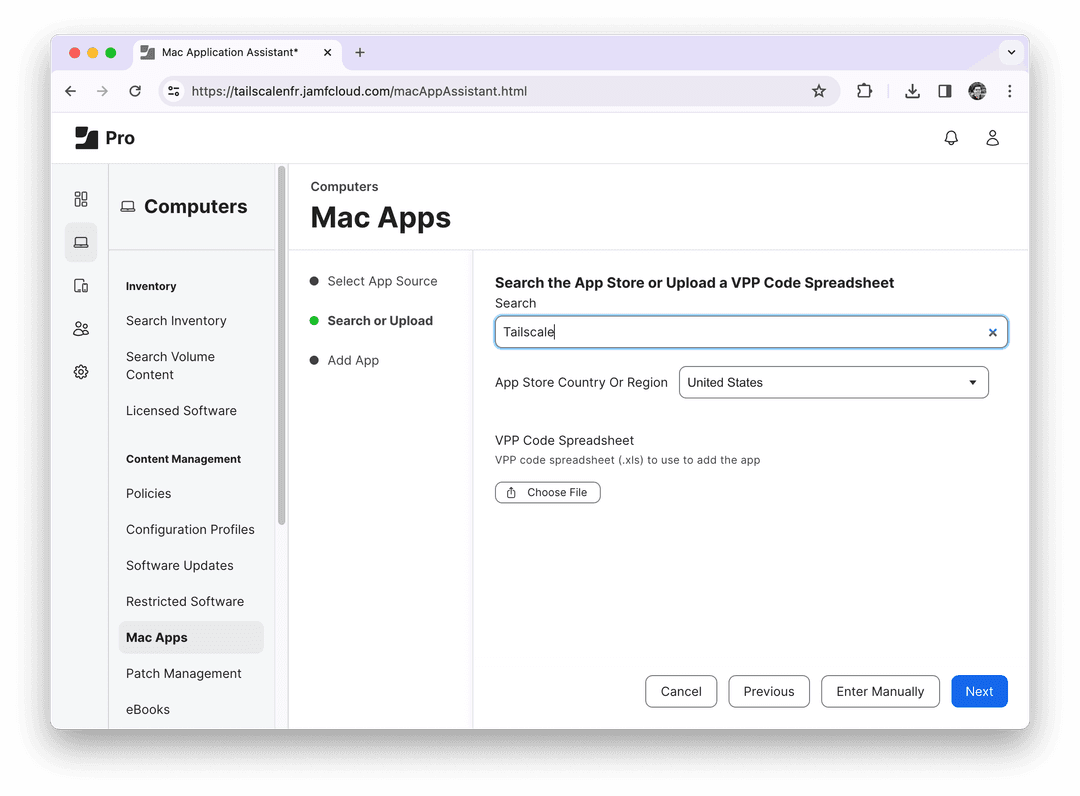
Search for Tailscale in the App Store for your current region.
-
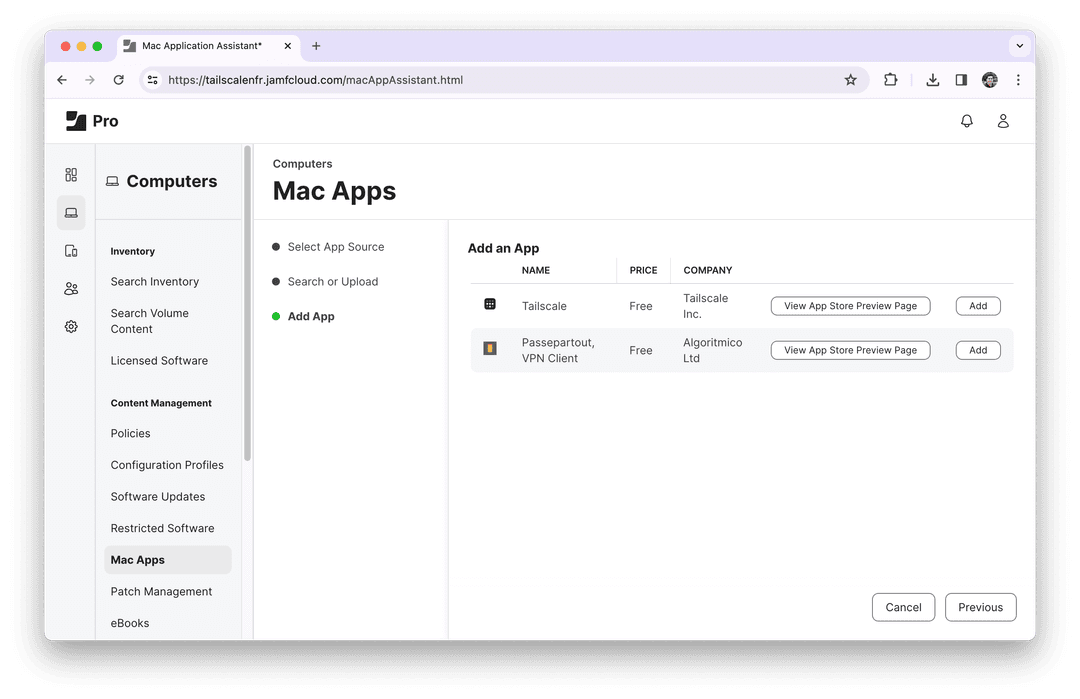
Click on the Add button for the Tailscale app in the search results.
-
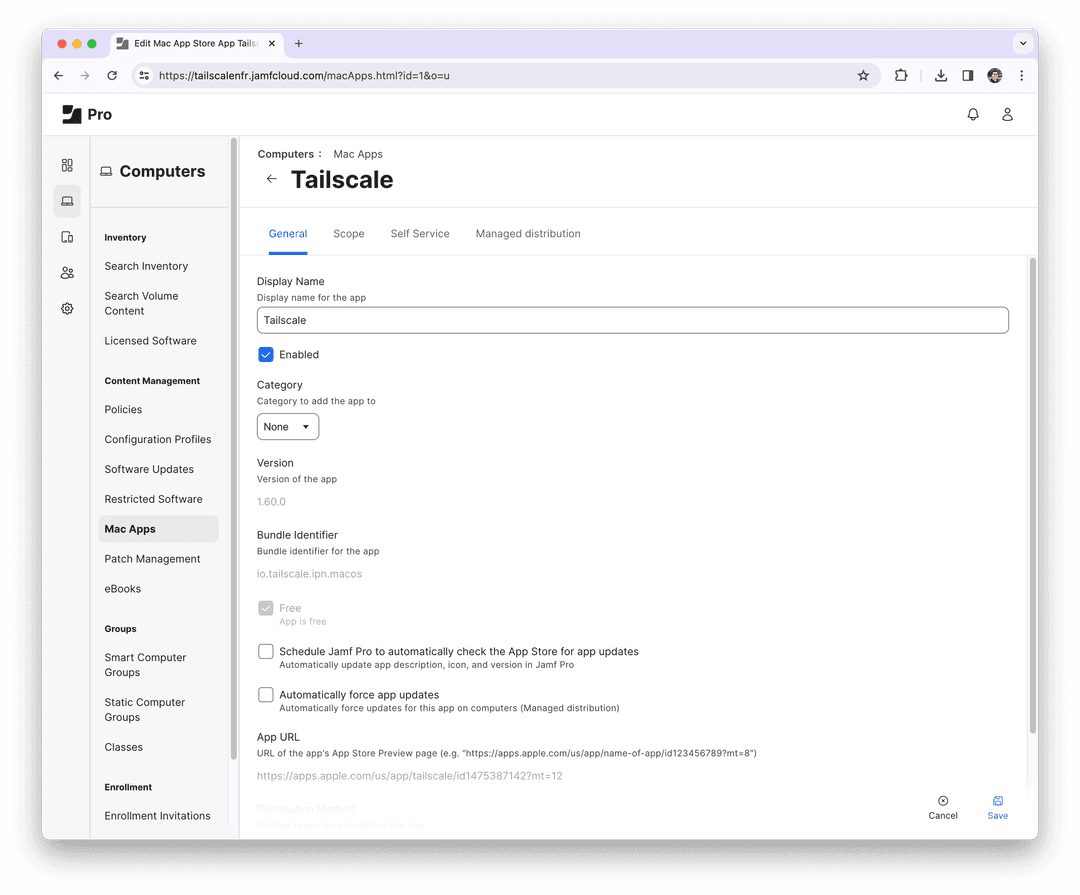
Set up any deployment options as needed, especially in the Scope tab.
-
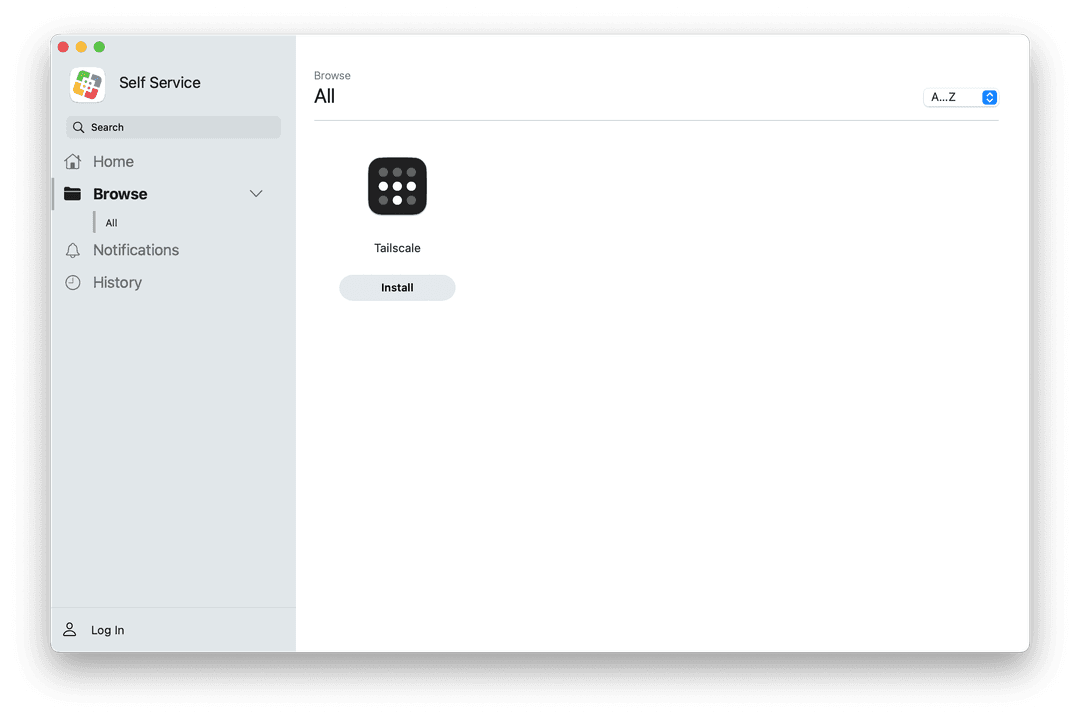
Tailscale should now be available in the Self Service app across your fleet.
Deploying system policies using Jamf Pro
We suggest reading the system policies topic to identify configuration options suitable for your organization. Once you know which policies you want to deploy to your fleet of devices, follow these steps to define them in Jamf:
-
Login to the Jamf Pro admin console for your organization at
<companyName>.jamfcloud.com. -
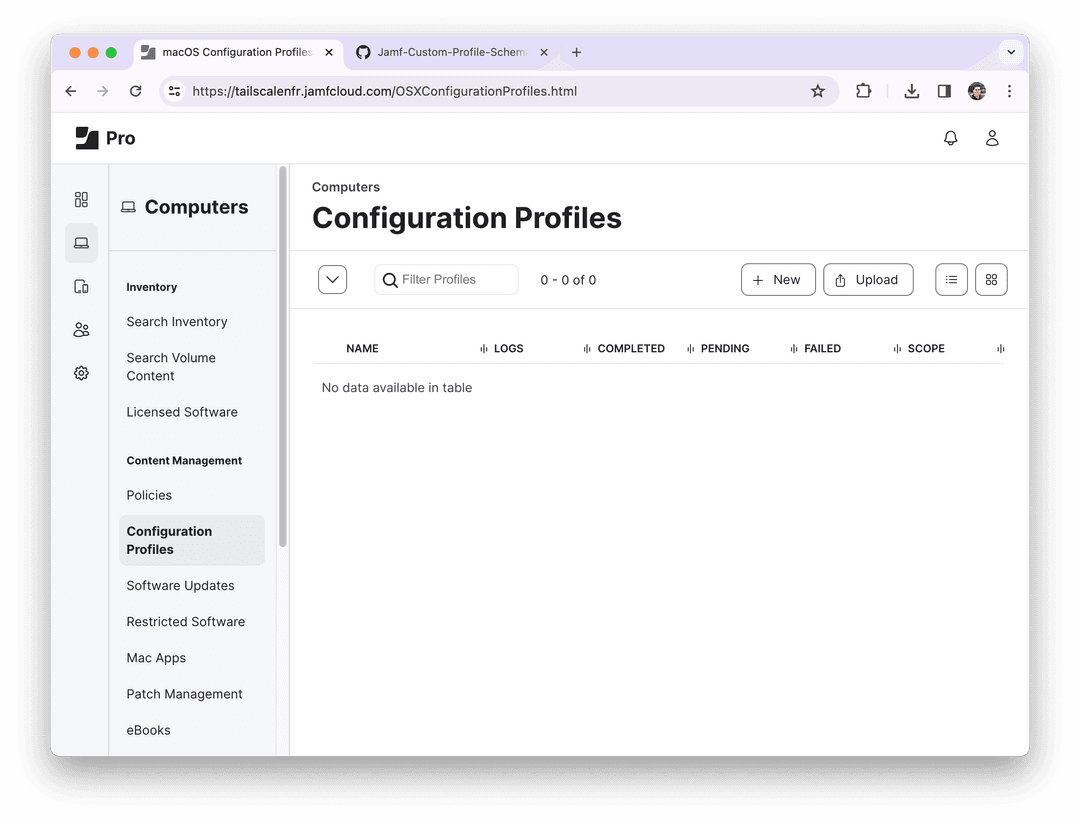
Navigate to Computers in the sidebar, and then Configuration Profiles in the Content Management section.
-
Select the New button at the top-right to create a new configuration profile.
-
Enter a descriptive display name for the profile such as Tailscale System Policies.

-
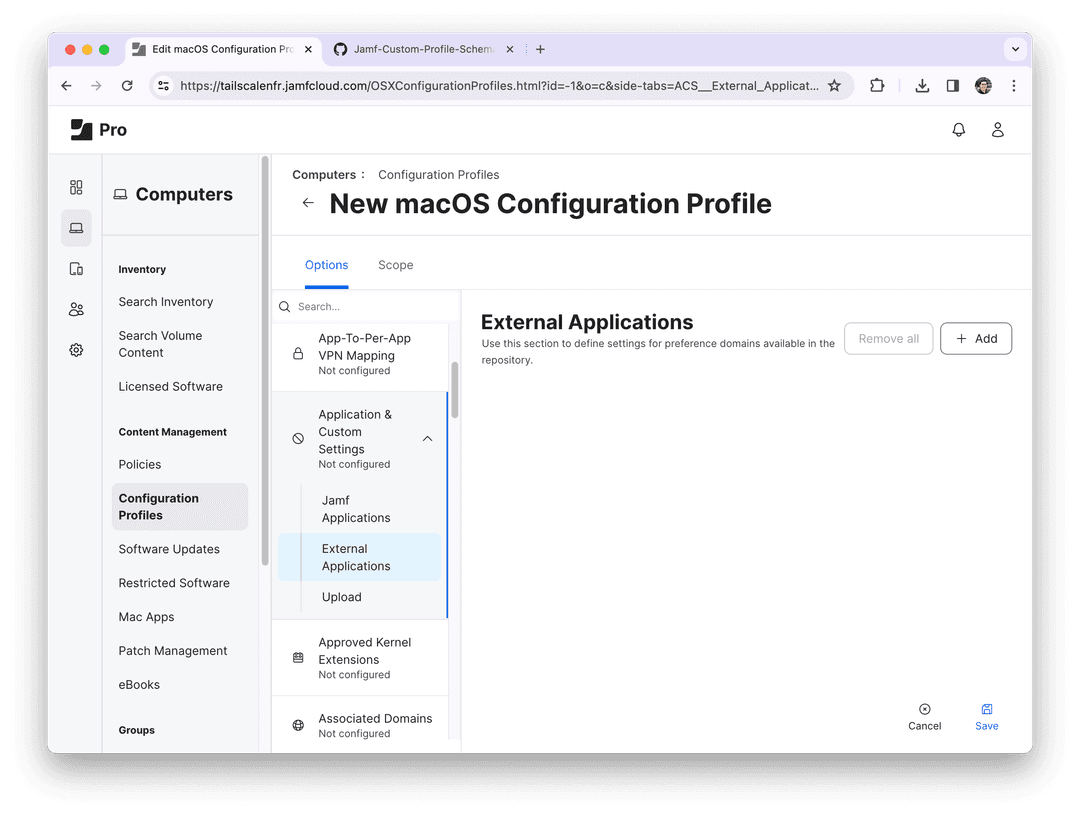
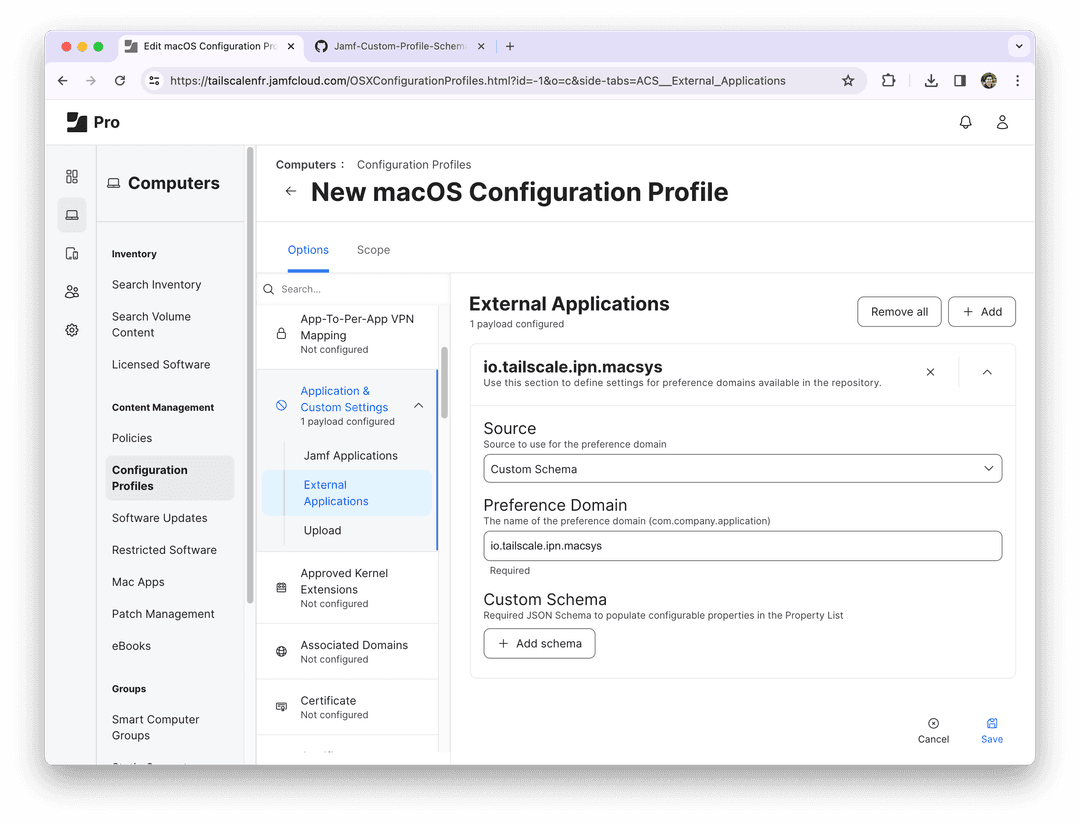
Select Application & Custom Settings, and then choose External Applications in the dropdown that appears.
-
Click on the Add button at the top-right to add a new preference domain.
-
Choose Custom Schema as the source to use for the preference domain.
-
Enter the proper name for the preference domain, which matches the bundle identifier of the Tailscale client. If you're using the Mac App Store variant of Tailscale, enter
io.tailscale.ipn.macos. If you're using the Standalone variant, enterio.tailscale.ipn.macsys. -
Click on Add Schema to provide a JSON schema.
-
In the modal window that appears, select Upload to provide the latest version of the Tailscale JSON schema. The ProfileManifestsMirror project provides up-to-date versions of the Tailscale profile manifest compatible with the Jamf JSON schema. You can download them from
io.tailscale.ipn.macos.jsonfor the Mac App Store variant of the client, and fromio.tailscale.ipn.macsys.jsonfor the Standalone variant. Upload the file to Jamf Pro once you have downloaded it from GitHub.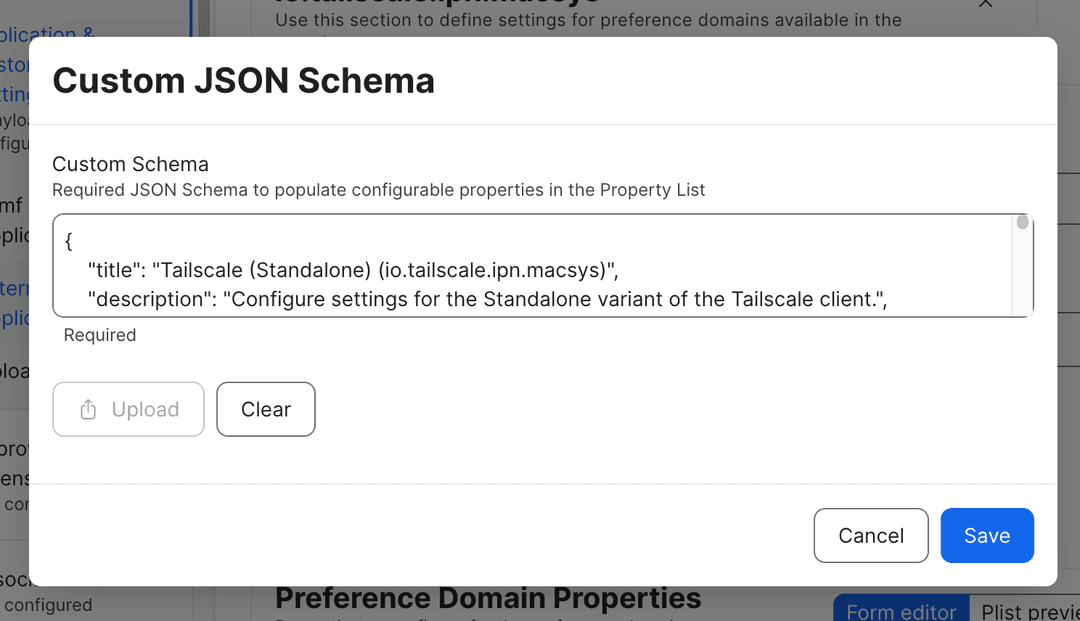
-
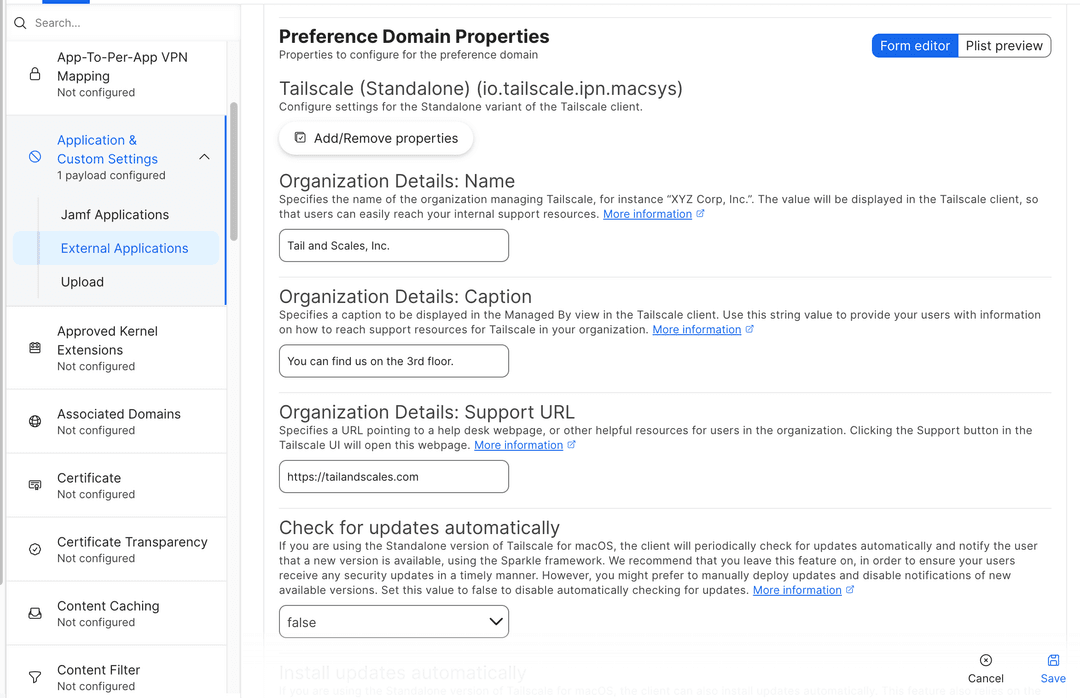
After uploading the JSON file, Jamf Pro will display a user interface to configure the Tailscale system policies. Complete the form by providing values for any policies you would like to set up.
-
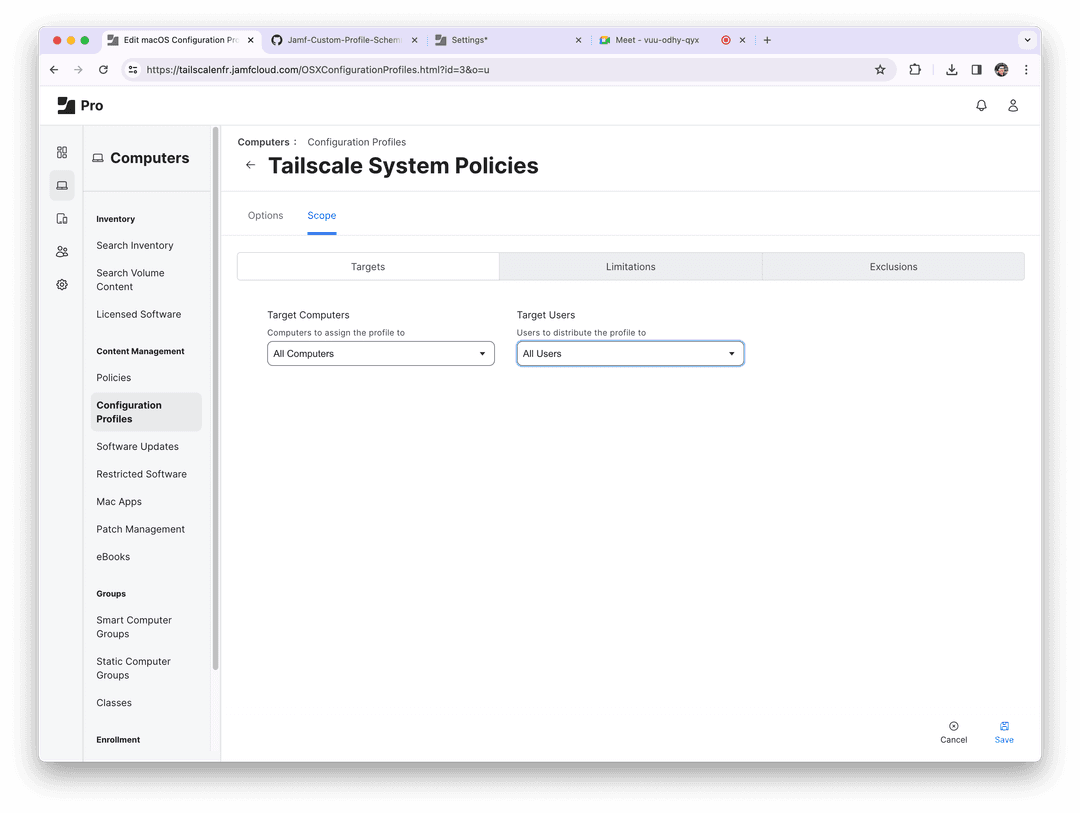
Remember to select the deployment scope for your configuration policies in the Scope tab. You may select All Computers as Target Computers to deploy the policies to all Macs in your organization.
-
Click on Save to save the configuration profile and begin deploying the policies. The Tailscale client must be restarted in order for all policies to be applied.